
A lot of ctfers in Korea(South) use Ghidra.
Although I’m terrible at ctfs, I also stumbled upon ghidra from solving picoCTF problems.
Ghidra is a decompiler.
The 3 mainstream decompilers that I know of are IDA, ghidra and Binary Ninja.
To the majority of the ctfers IDA is the go-to choice.
However, if you’re not a hardcore ctf/security person, the pro versions are really expensive.
The free version does exist, but the downside is that it can only decompile amd64 or x86 ELF files.
Even though I’m not a ctf/security guy, I decided to install Ghidra just to get a chance to study the internals of executables.
Ghidra was initially used internally by the NSA.
However in 2019, they decided to launch it as an open source project.
It’s written in Java, and since it’s open source you can download it from github.
There are 3 file types you can download.
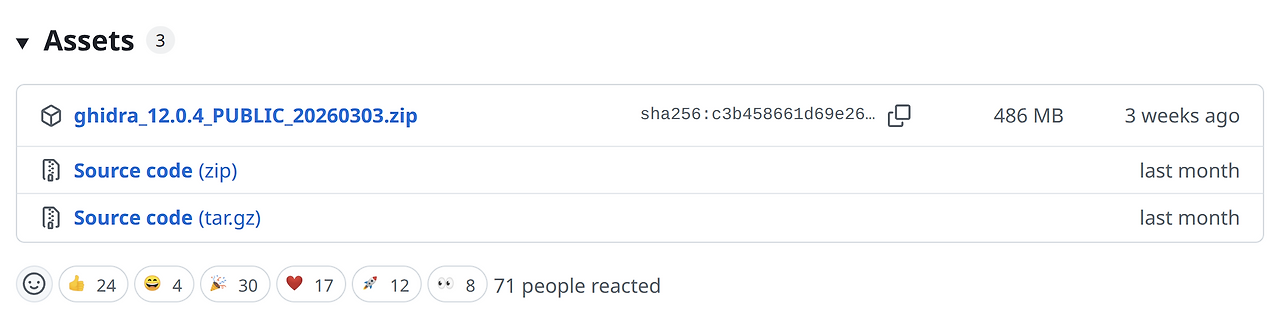
The first was is a zip file with a filename that consists of the ghidra version, public and the release date.
Unlike two versions beneath it, you can download the file, extract it and can decompile binaries right away.
If you’re a regular ctfer or an binary analysis enthusiast, I recommend downloading this one.
Then what’s the purpose of providing the other two versions?
The file right below it is a Source code file with a .zip extension.
The source code is literally ghidra’s source code.
NSA released this one for people who want to make their own plugins, add-ons or those who even like to modify the original source code.
Then why did they provide the two different file formats zip and tar.gz respectfully for the source code?
I’m not a hundred percent sure, but my guess is that when NSA created ghidra, they wanted people to use their program without an architecture(AMD64, ARM) or OS(GNU/Linux, Windows, Mac OS) dependency.
So for the Windows, and Mac users they provided the .zip file and for the GNU/Linux users they released a tar.gz file.
That’ll be it, for the short intro to the types of decompilers and what ghidra is.
Now let’s download the program.
Since ghidra is written in Java, you need to install Java before installing ghidra.
You can download JDK from here.
For your information, you shouldn’t download JDK25 because ghidra requires JDK21.
It looks like ghidra doesn’t favor the experimental new features that JDK25 has.
After installing JDK21, you need to install Gradle 8.5.
I wasn’t familiar with Gradle, due to my lack of Java experience.
However, someone on Reddit explained what gradle is in a beginner-friendly manner.
In short, you can think of gradle as a GNU make for the Java programs.
Run gradle after the installation, and it will begin ghidra build process.
After the installation, executing the shellscript named ghidraRun will start ghidra.
Unfortunately, you’ll face 2 problems.
Well, at least I did.
The first problem was that whenever I ran ghidraRun, the icons were much smaller in contrast to the fonts.
Someone also faced this issue, and posted their solution on github
The gist solution, worked like a charm.
To make the icon sizes bigger you can change the value from supports/launch.properties like so.
VMARGS_LINUX=-Dsun.java2d.uiScale=2
Another problem was that whenever I ran ghidraRun, the app icon wouldn’t pop up properly.
It showed the missing dock icon which looks like a gear instead.
This one was much harder to fix than the previous issue.
Luckily, I found this.
In order for Ubuntu to show the ghidra app icon instead of the gear looking icon, it needs a file named ghidra.desktop ~/.local/share/applications/.
Sadly, I did exactly as the website told me to do but failed.
Here’s what my first attempt creating the ghidra.desktop file looked like.
[Desktop Entry]
Version=1.0
Name=Ghidra
Exec=/home/hwkim301/ghidra_12.0.4_PUBLIC/ghidraRun
Icon=/home/hwkim301/ghidra_12.0.4_PUBLIC/support/ghidra.ico
Type=Application
Categories=Development;
One caveat is that, GNOME and KDE have trouble dealing with .ico files.
As a result, instead of using the .ico files you’ll need to use png or some other image file format.
Therefore we need to change the ghidra.ico file to a png file.
I used ImageMagick to do this.
Install ImageMagick if it’s not installed.
Then run the convert command to convert ico to png.
convert ghidra.ico ghidra.png
Imagemagick will generate 7 png files.
Choose the biggest one, ghidra7.png.
Change ghidra7.png to ghidra.png and change the WM_CLASS to ghidra-Ghidra.
[Desktop Entry]
Version=1.0
Name=Ghidra
Exec=/home/hwkim301/ghidra_12.0.4_PUBLIC/ghidraRun
Icon=/home/hwkim301/ghidra_12.0.4_PUBLIC/support/ghidra.png
Type=Application
Categories=Development;
StartupWMClass=ghidra-Ghidra
Now logout of your machine and login again and then run the ghidraRun file.
You’ll have a high chance it will now show the icon properly.
I’m not exactly sure what WM_CLASS and xprop do.
I think it’s got to be something related with X11 and Wayland.
Might have to some extra research on it but well…
Ghidra is much harder to install than IDA.
Merely getting hands-on experience on the installation process seems to touch various aspects of CS.
To learn the functionalities of ghidra I recommend searching seasoned ctfers blogs.
Here’s a ghidra guide in Korean from ctfers.